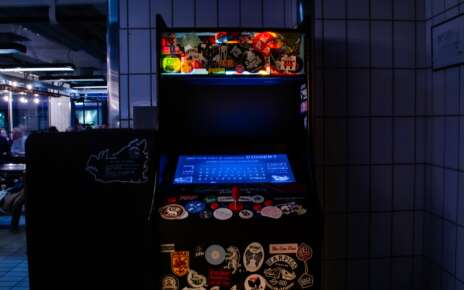
Are you an avid gamer who loves playing classic arcade games? If so, why not take your gaming experience to the next level by building your very own arcade cabinet? It’s easier than you think! With a few basic tools and components, you can create an amazing machine that will let you enjoy all your favorite classic games from the comfort of your own home. Plus, you can decorate it with as much style and flare as you like. In this article, we’ll provide step-by-step instructions for building your dream arcade gaming cabinet. So get ready to join the retro revolution!
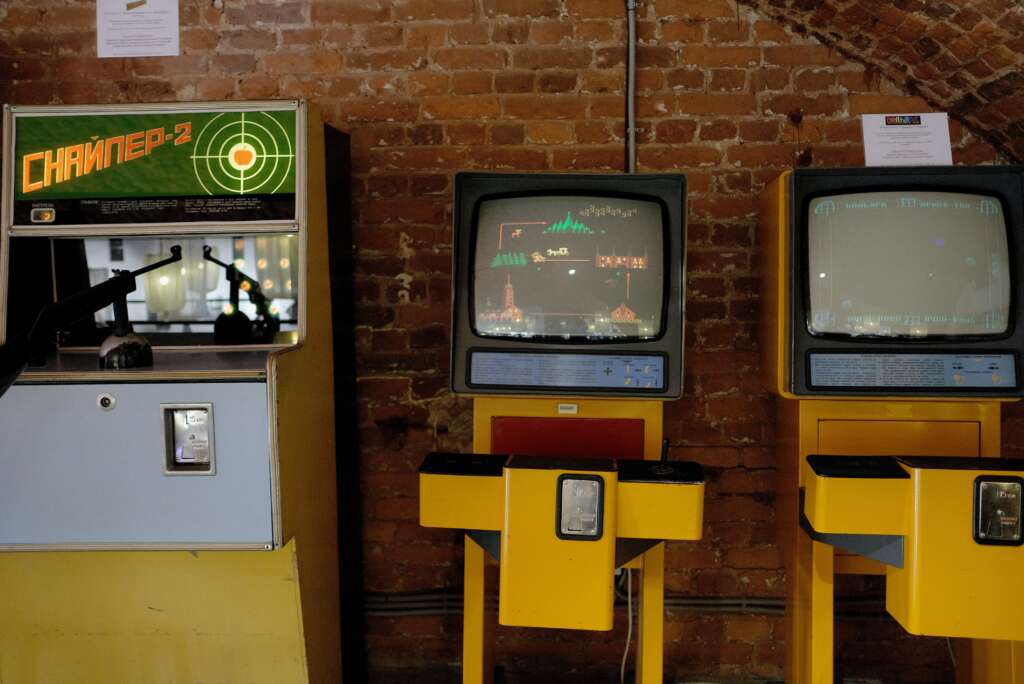
What is an Arcade Cabinet?
An arcade cabinet is a type of video game machine, usually larger than other gaming consoles, that features one or more games stored in it. It has been popular for decades, and today’s cabinets come in various sizes and configurations. A full-size arcade machine typically has a large screen, two control panels with buttons, joysticks, and other controls, speakers, lights, and graphics on the sides. Some models also feature coin slots to allow players to insert coins as they play.
The most common type of cabinet is the classic upright cabinet which stands up against the wall; however, there are also cocktail cabinets that can be placed on tabletops, console panel cabinets that are specifically designed for specific console systems, and dedicated machines which have just one game built into them.
Arcade cabinets are a great way to bring the fun of gaming into your home, and with the right parts and tools, you can create your own unique gaming experience. But what exactly do you need for a successful setup? Read on to find out!
Parts and Tools Needed
Creating your own arcade cabinet requires a few key components to ensure that you have the best gaming experience possible. To start, you will need some sort of computer or game console like a Raspberry Pi to run the games, as well as an LCD monitor so you can see the action. You should also invest in an arcade controller with buttons and joysticks, as well as a power strip and power buttons to switch between different game settings.
If you want classic games, look for vintage machines or classic cabinets to give your setup an authentic feel. Lastly, if you choose an upright cabinet, make sure it has speaker holes so that you can connect external speakers. With all these parts and tools in place, your custom arcade machine will be ready to go!
With the perfect combination of computer, monitor, controller and cabinet, your custom arcade machine will be ready to bring you hours of enjoyment. Get ready to take your gaming experience to the next level with some essential hardware tools!
Hardware Tools
Having the right hardware tools is essential for building your own custom arcade machine. It’s important to have a few basic tools on hand before you start, such as an electric drill, screwdriver, and wire cutters. You’ll also need to invest in a soldering iron if you plan on connecting your wiring correctly. Additionally, having access to a machine shop can be helpful for cutting out pieces of wood or metal needed for your cabinet. Finally, make sure that you have some extra screws and nails handy just in case something goes wrong with your build. With the right hardware tools and supplies, you can create an incredible custom arcade machine of your very own!
Materials and Components
Materials and components play an important role in the construction of an arcade cabinet. Depending on the type of game you plan to build, you will need to buy specific materials and components that are compatible with your setup. For example, if you’re building a classic arcade machine, you will need to purchase a vintage control panel and console panel that is compatible with your chosen games.
Additionally, you may also need to purchase speakers, LCD monitors, buttons, joysticks, and power strips to complete the setup. This part of the process can be quite expensive so it’s important to plan ahead for what materials and components you need before beginning any construction work. With the right materials and components in hand, you can create an amazing custom arcade machine that looks just like the real deal!
Decorative Items
Decorative items can be used to add a personal touch and individual flair to your arcade cabinet. From vinyl decals, artwork, and neon lights to custom fabric designs, there are plenty of ways to make your machine stand out from the crowd. Vinyl decals are especially popular as they’re easy to apply and come in a range of colors and patterns. If you’d like something more unique, you could create your own designs with stencils or fabric paint.
Artwork is also an option for those who want to add some character to their cabinet – it could be anything from portraits of classic game characters or original artwork inspired by classic games. Finally, neon lighting creates a great atmosphere and will really make your machine stand out at night time! With these decorative items, you can create an amazing gaming experience that no one else has!
Preparing the Cabinet for Assembly
Preparing the cabinet for assembly is an important step in creating your own arcade gaming cabinet. Before you start, make sure to carefully measure, cut and sand all pieces of wood to the desired size and shape. Once this is done, use wood glue or clamps to attach them together. If needed, you can also use screws or nails to provide extra stability.
For a neater look, you can cover any visible screws with decorative caps or trim. Finally, use sandpaper to smooth out any rough edges and give your cabinet a polished finish before it’s time to assemble it! With these steps completed, you’re ready for the final stages of building your arcade gaming cabinet!
Once the cabinet is assembled, you’ll be able to add your own personal touch with design and decoration. Get ready for a truly unique experience as you prepare to design the layout of the console panel!
Designing the Layout of the Console Panel
Designing the layout of the console panel is an integral part of creating your own custom arcade gaming cabinet. When designing your cabinet, consider factors such as the number and size of buttons, joystick position, and speaker holes. Additionally, take note of any existing wiring or cables that must be routed through the cabinet for a professional look. Once you have a design in mind, it’s time to begin cutting out the necessary components. Carefully measure and mark each component before using a jigsaw or router to cut them out. Furthermore, make sure to sand down any rough edges after cutting for a polished finish.
Finally, attach all components securely with screws or nails and use wood glue if desired for extra stability. With these simple steps completed, you’re ready to start assembling your custom arcade gaming cabinet!
Cutting Holes for Speaker and Power Buttons in the Console Panel
Cutting holes for the speaker and power buttons in the console panel is a necessary step to creating your own custom arcade gaming cabinet. First, measure and mark the locations of the speaker and power button holes with a pencil or marker. Next, use a drill to create pilot holes at each marked spot. This will ensure that you have an accurate starting point for cutting out larger holes with a jigsaw.
When drilling, take extra care not to damage any existing wiring or components on the panel. After all of the holes are cut out, use sandpaper to smooth out any rough edges left from the drilling process.
Finally, test fit your speaker and power buttons into their respective slots before securing them in place with screws if desired for extra stability. With these steps completed, your console panel is ready for assembly!
Installing an LCD Monitor to View Games on
Installing an LCD monitor is essential for viewing the games on your arcade gaming cabinet. Start by mounting the LCD monitor to the inside wall of the cabinet using screws or industrial-strength adhesive. Ensure that it is firmly attached and level before continuing with the installation process.
Next, run a power cable from an outlet in the back of the cabinet up to the monitor and plug it into the power port on the back of the screen. Then, connect your game console to one of the video ports on either side of the LCD panel using a compatible HDMI or VGA cable.
Finally, turn on both devices and test out a few classic games to make sure everything is working correctly, and enjoy! With these steps completed, you will be ready to play all your favorite classic arcade games in style!
Setting up Power Strip and Connecting All Wires
Setting up a power strip and connecting all of the wires is essential to powering your arcade gaming cabinet. Start by finding a secure location inside of the cabinet to install the power strip, such as the back wall or under the control panel. Make sure that it is out of reach of anyone who may be playing in order to prevent accidental shock. Once you have found an appropriate spot, attach it to the wall with screws or industrial-strength adhesive and plug it into an outlet on either side of the cabinet.
Next, connect each device in your arcade gaming cabinet – such as the game console, monitor, speakers, etc – to its own individual port on the power strip using compatible cables. To ensure safety, double-check that all devices are securely plugged in before turning on your power supply. With these steps completed, you will be ready to enjoy your classic arcade games in style!

Assembling the Cabinet
Assembling your arcade gaming cabinet is an important step in creating a classic gaming experience. Start by laying out all of the components and parts, such as the arcade cabinet kit, control panel, LCD monitor, speaker holes, console panel, power buttons, and so on. Carefully read through the instructions provided with your kit to ensure that you understand each step of the assembly process. Next, use a power screwdriver and appropriate screws to attach each part together according to the instructions. Make sure that all connections are secure before proceeding further.
Finally, once everything is connected properly and securely fastened together with screws or bolts, you can move on to connecting wires and setting up power sources for your gaming cabinet. With these steps completed, you will be ready to start playing your favorite classic games in style!
Your classic gaming experience is ready to begin! With your arcade gaming cabinet assembled and power sources connected, you can now enjoy hours of retro fun. Now it’s time to make sure your monitor is securely attached to the console panel – get ready to take your classic gaming experience to the next level!
Attaching Monitor Mount to Console Panel
Attaching a monitor mount to the console panel of your arcade gaming cabinet is an important step in creating the perfect classic gaming experience. To begin, make sure that all of your parts are included and that you have read through the instructions carefully. Next, use a power screwdriver to attach the monitor mount to the backside of the console panel. Ensure that all connections are secure before moving on. Finally, connect wires from the monitor mount to the power source and double-check for any loose connections. With these steps completed, you’ll be ready to enjoy hours of retro fun with your newly constructed arcade gaming cabinet.
Attaching Arcade Controller to Console Panel
Attaching an arcade controller to the console panel of your gaming cabinet is a crucial step in creating the perfect classic gaming experience. Before beginning, make sure to read through the instructions and ensure that all parts are included. Next, use power screws to attach the arcade controller to the backside of the console panel. Make sure all connections are secure before moving on. Finally, connect wires from the controller to the power source and double-check for any loose connections. With these steps complete, you’ll be ready to start enjoying hours of entertainment with your newly constructed gaming cabinet.
Installing Raspberry Pi and Control Panels
Installing a Raspberry Pi and control panels into an arcade gaming cabinet is the first step in creating the perfect classic gaming experience. Before beginning, it is important to familiarize yourself with the parts included, as well as read through instructions carefully. To begin, mount the control panel onto the cabinet using power screws and make sure all connections are secure before moving on. Next, install the Raspberry Pi by connecting wires from the computer board to a power source and double-check for any loose connections. Finally, attach speakers to speaker holes at the back of the cabinet for sound output. With these steps complete, you’ll be ready for hours of entertainment with your newly constructed arcade gaming cabinet.
Final Touches & Testing of the Machine
Once the Raspberry Pi and control panels are installed, it’s time to focus on the final touches for a successful arcade gaming cabinet. Before testing out the machine, make sure to attach all necessary power buttons and ensure that wires are securely connected. Additionally, double-check that any LCD monitor or display is properly fitted into the cabinet. Finally, plug in all cords from the audio speakers to the machine and test out each game before playing. With these steps complete, your arcade gaming cabinet will be ready for endless hours of classic gaming fun!
Your classic arcade gaming cabinet is now ready for play! Now, it’s time to turn your attention to the exterior and make sure your cabinet looks as good as it plays with a few simple painting and decorating touches.
Painting and Decorating the Exterior
Painting and decorating the exterior of your arcade gaming cabinet is an important finishing touch that can make all the difference. To begin, it’s important to select a paint color or design that will fit with the overall look and feel of the cabinet. Once you’ve selected a paint, use a high-quality brush or roller to apply two coats of paint evenly. Afterward, you may want to seal the paint with a clear coat for added protection. Additionally, if desired, add stickers or other decorations to customize your cabinet even further! With a few simple painting and decorating steps, your arcade gaming cabinet will be ready to show off at home or at any classic gaming event.
Adding Retro and Classic Video Games
Adding retro and classic video games to an arcade gaming cabinet is a great way to give it an authentic look and feel. There are a variety of ways to include these classic games, from purchasing original hardware and cartridges for older systems, such as the NES or the Sega Genesis, to downloading ROMs for emulators that can be run on modern PCs. Many modern arcade cabinets will already have hardware installed to support a wide range of classic video game consoles, making it easy to get started playing your favorite retro titles. Additionally, you can use an LCD monitor in place of an old-fashioned CRT TV or monitor if you prefer a more modern look while still enjoying classic games. With just a few simple steps, adding retro and classic video game titles to an arcade gaming cabinet can be an enjoyable experience!

Completing Connection Tests Before Playing on the Machine
Before playing on any type of arcade gaming machine, it is always wise to complete a connection test to ensure that all components are functioning properly. This can involve testing the power supply, making sure the buttons and joystick are all connected and working, and testing to make sure the audio and video outputs are in good working order. Additionally, if you are using a Raspberry Pi or other computer-based system with your machine, you will need to connect it up to a monitor or TV before powering it on and running any tests. Once you have completed these connection tests and verified that all components are functioning as expected, you can confidently start playing your favorite classic arcade games or retro titles!
Maintenance Tips for Your Arcade Cabinet
Maintaining your arcade cabinet is essential to ensure that you can enjoy playing it for years to come. To keep your machine in good condition, be sure to clean and dust the cabinet periodically. This will help preserve the aesthetics, prevent any dirt or dust particles from getting into the internals of the machine, and also help protect against any potential damage caused by long-term exposure to the elements. Additionally, it is important to check all wiring and connections on a regular basis to ensure that everything is tight and secure.
If you detect any damaged wires or other issues, be sure to have them repaired as soon as possible so that they do not cause further damage or lead to any malfunctions when playing games. Taking these simple steps will go a long way toward ensuring that your classic arcade cabinet remains in top condition for many years of gaming enjoyment!
By cleaning, dusting, and checking your arcade cabinet regularly, you can ensure that it will remain in great condition for years to come and provide endless hours of nostalgic gaming fun. But don’t worry, there’s still more to learn about arcade cabinets! In our next section, we’ll explore the various ways to customize your machine with modifications and upgrades.
Conclusion
Having an arcade cabinet in your home is a great way to relive the classic days of gaming and add a touch of nostalgia to any room. With proper care and maintenance, you can ensure that your arcade cabinet remains in good condition for many years of enjoyment. Cleaning and dusting the machine regularly will help preserve its aesthetics, prevent dirt from getting into its internals, and protect it from potential damage caused by long-term exposure to the elements. It is equally important to check all wiring and connections on a regular basis to ensure that everything is tight and secure. Taking these steps will go a long way towards ensuring that your classic arcade cabinet remains in top condition for many years of game-playing pleasure.